预计阅读本页时间:-

第9章
下载文件和图片
在之前的章节中,我们学习了从网页中爬取信息的方法,这只是爬虫最典型的一种应用,除此之外,下载文件也是实际应用中很常见的一种需求,例如使用爬虫爬取网站中的图片、视频、WORD文档、PDF文件、压缩包等。本章来学习在Scrapy中如何下载文件和图片。
9.1 FilesPipeline和ImagesPipeline
Scrapy框架内部提供了两个Item Pipeline,专门用于下载文件和图片:
● FilesPipeline
广告:个人专属 VPN,独立 IP,无限流量,多机房切换,还可以屏蔽广告和恶意软件,每月最低仅 5 美元
● ImagesPipeline
我们可以将这两个Item Pipeline看作特殊的下载器,用户使用时只需要通过item的一个特殊字段将要下载文件或图片的url传递给它们,它们会自动将文件或图片下载到本地,并将下载结果信息存入item的另一个特殊字段,以便用户在导出文件中查阅。下面详细介绍如何使用它们。
9.1.1 FilesPipeline使用说明
通过一个简单的例子讲解FilesPipeline的使用,在如下页面中可以下载多本PDF格式的小说:
     <html>
        <body>
           ...
           <a href='/book/sg.pdf'>下载《三国演义》</a>
           <a href='/book/shz.pdf'>下载《水浒传》</a>
           <a href='/book/hlm.pdf'>下载《红楼梦》</a>
           <a href='/book/xyj.pdf'>下载《西游记》</a>
           ...
        </body>
     </html>
使用FilesPipeline下载页面中所有PDF文件,可按以下步骤进行:
步骤 01 在配置文件settings.py中启用FilesPipeline,通常将其置于其他Item Pipeline之前:
ITEM_PIPELINES = {'scrapy.pipelines.files.FilesPipeline': 1}
步骤 02 在配置文件settings.py中,使用FILES_STORE指定文件下载目录,如:
FILES_STORE = '/home/liushuo/Download/scrapy'
步骤 03 在Spider解析一个包含文件下载链接的页面时,将所有需要下载文件的url地址收集到一个列表,赋给item的file_urls字段(item['file_urls'])。FilesPipeline在处理每一项item时,会读取item['file_urls'],对其中每一个url进行下载,Spider示例代码如下:
     class DownloadBookSpider(scrapy.Spider):
        ...


        def parse(response):
            item = {}
            # 下载列表
            item['file_urls'] = []
     for url in response.xpath('//a/@href').extract():
        download_url = response.urljoin(url)
        # 将url 填入下载列表
        item['file_urls'].append(download_url)


     yield item
当FilesPipeline下载完item['file_urls']中的所有文件后,会将各文件的下载结果信息收集到另一个列表,赋给item的files字段(item['files'])。下载结果信息包括以下内容:
● Path文件下载到本地的路径(相对于FILES_STORE的相对路径)。
● Checksum文件的校验和。
● url文件的url地址。
9.1.2 ImagesPipeline使用说明
图片也是文件,所以下载图片本质上也是下载文件,ImagesPipeline是FilesPipeline的子类,使用上和FilesPipeline大同小异,只是在所使用的item字段和配置选项上略有差别,如表9-1所示。
表9-1 ImagesPipeline和FilesPipeline

ImagesPipeline在FilesPipleline的基础上针对图片增加了一些特有的功能:
● 为图片生成缩略图
开启该功能,只需在配置文件settings.py中设置IMAGES_THUMBS,它是一个字典,每一项的值是缩略图的尺寸,代码如下:
     IMAGES_THUMBS = {
        'small': (50, 50),
        'big': (270, 270),
     }
开启该功能后,下载一张图片时,本地会出现3张图片(1张原图片,2张缩略图),路径如下:
     [IMAGES_STORE]/full/63bbfea82b8880ed33cdb762aa11fab722a90a24.jpg
     [IMAGES_STORE]/thumbs/small/63bbfea82b8880ed33cdb762aa11fab722a90a24.jpg
     [IMAGES_STORE]/thumbs/big/63bbfea82b8880ed33cdb762aa11fab722a90a24.jpg
● 过滤掉尺寸过小的图片
开启该功能,需在配置文件settings.py中设置IMAGES_MIN_WIDTH和IMAGES_MIN_HEIGHT,它们分别指定图片最小的宽和高,代码如下:
     IMAGES_MIN_WIDTH = 110
     IMAGES_MIN_HEIGHT = 110
开启该功能后,如果下载了一张105×200的图片,该图片就会被抛弃掉,因为它的宽度不符合标准。
9.2 项目实战:爬取matplotlib例子源码文件
下面我们来完成一个使用FilesPipeline下载文件的实战项目。matplotlib是一个非常著名的Python绘图库,广泛应用于科学计算和数据分析等领域。在matplotlib网站上提供了许多应用例子代码,在浏览器中访问http://matplotlib.org/examples/index.html,可看到图9-1所示的例子列表页面。
其中有几百个例子,被分成多个类别,单击第一个例子,进入其页面,如图9-2所示。
用户可以在每个例子页面中阅读源码,也可以点击页面中的source code按钮下载源码文件。如果我们想把所有例子的源码文件都下载到本地,可以编写一个爬虫程序完成这个任务。
9.2.1 项目需求
下载http://matplotlib.org网站中所有例子的源码文件到本地。
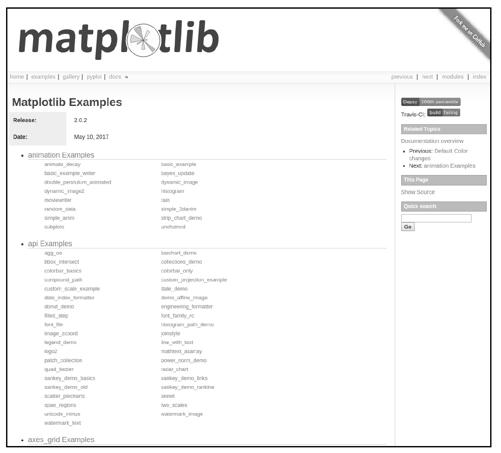
图9-1
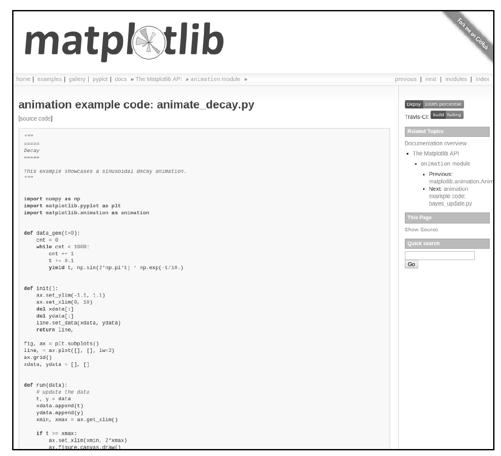
图9-2
9.2.2 页面分析
先来看如何在例子列表页面http://matplotlib.org/examples/index.html中获取所有例子页面的链接。使用scrapy shell命令下载页面,然后调用view函数在浏览器中查看页面,如图9-3所示。
     $ scrapy shell http://matplotlib.org/examples/index.html
     ...
     >>> view(response)

图9-3
观察发现,所有例子页面的链接都在<div class="toctree-wrapper compound">下的每一个<li class="toctree-l2">中,例如:
<a class="reference internal" href="animation/animate_decay.html">animate_decay</a>
使用LinkExtractor提取所有例子页面的链接,代码如下:
     >>> from scrapy.linkextractors import LinkExtractor
     >>> le = LinkExtractor(restrict_css='div.toctree-wrapper.compound li.toctree-l2')
     >>> links = le.extract_links(response)
     >>> [link.url for link in links]
     ['http://matplotlib.org/examples/animation/animate_decay.html',
     'http://matplotlib.org/examples/animation/basic_example.html',
     'http://matplotlib.org/examples/animation/basic_example_writer.html',
      'http://matplotlib.org/examples/animation/bayes_update.html',
      'http://matplotlib.org/examples/animation/double_pendulum_animated.html',
      'http://matplotlib.org/examples/animation/dynamic_image.html',
      'http://matplotlib.org/examples/animation/dynamic_image2.html',
      'http://matplotlib.org/examples/animation/histogram.html',
      'http://matplotlib.org/examples/animation/moviewriter.html',
      'http://matplotlib.org/examples/animation/rain.html',
      'http://matplotlib.org/examples/animation/random_data.html',
      'http://matplotlib.org/examples/animation/simple_3danim.html',
      'http://matplotlib.org/examples/animation/simple_anim.html',
      'http://matplotlib.org/examples/animation/strip_chart_demo.html',
      'http://matplotlib.org/examples/animation/subplots.html',
      'http://matplotlib.org/examples/animation/unchained.html',
      'http://matplotlib.org/examples/api/agg_oo.html',
      'http://matplotlib.org/examples/api/barchart_demo.html',
      'http://matplotlib.org/examples/api/bbox_intersect.html',
      ...
      'http://matplotlib.org/examples/user_interfaces/svg_tooltip.html',
      'http://matplotlib.org/examples/user_interfaces/toolmanager.html',
      'http://matplotlib.org/examples/user_interfaces/wxcursor_demo.html',
      'http://matplotlib.org/examples/widgets/buttons.html',
      'http://matplotlib.org/examples/widgets/check_buttons.html',
      'http://matplotlib.org/examples/widgets/cursor.html',
      'http://matplotlib.org/examples/widgets/lasso_selector_demo.html',
      'http://matplotlib.org/examples/widgets/menu.html',
      'http://matplotlib.org/examples/widgets/multicursor.html',
      'http://matplotlib.org/examples/widgets/radio_buttons.html',
      'http://matplotlib.org/examples/widgets/rectangle_selector.html',
      'http://matplotlib.org/examples/widgets/slider_demo.html',
      'http://matplotlib.org/examples/widgets/span_selector.html']
     >>> len(links)
     507
例子列表页面分析完毕,总共找到了507个例子。
接下来分析例子页面。调用fetch函数下载第一个例子页面,并调用view函数在浏览器中查看页面,如图9-4所示。
     >>> fetch('http://matplotlib.org/examples/animation/animate_decay.html')
     ...
     >>> view(response)
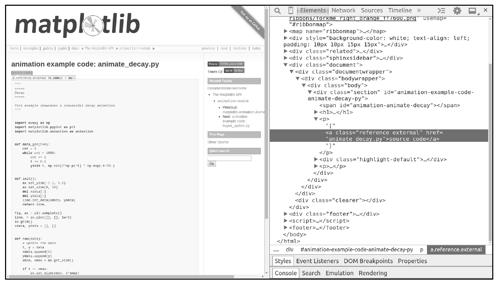
图9-4
在一个例子页面中,例子源码文件的下载地址可在<a class="reference external">中找到:
     >>> href = response.css('a.reference.external::attr(href)').extract_first()
     >>> href
     'animate_decay.py'
     >>> response.urljoin(href)
     'http://matplotlib.org/examples/animation/animate_decay.py'
到此,页面分析的工作完成了。
9.2.3 编码实现
接下来,我们按以下4步完成该项目:
(1)创建Scrapy项目,并使用scrapy genspider命令创建Spider。
(2)在配置文件中启用FilesPipeline,并指定文件下载目录。
(3)实现ExampleItem(可选)。
(4)实现ExamplesSpider。
步骤 01 首先创建Scrapy项目,取名为matplotlib_examples,再使用scrapy genspider命令创建Spider:
     $ scrapy startproject matplotlib_examples
     $ cd matplotlib_examples
     $ scrapy genspider examples matplotlib.org
步骤 02 在配置文件settings.py中启用FilesPipeline,并指定文件下载目录,代码如下:
     ITEM_PIPELINES = {
       'scrapy.pipelines.files.FilesPipeline': 1,
     }
     FILES_STORE = 'examples_src'
步骤 03 实现ExampleItem,需定义file_urls和files两个字段,在items.py中完成如下代码:
     class ExampleItem(scrapy.Item):
        file_urls = scrapy.Field()
        files = scrapy.Field()
步骤 04 实现ExamplesSpider。首先设置起始爬取点:
     import scrapy


     class ExamplesSpider(scrapy.Spider):
        name = "examples"
        allowed_domains = ["matplotlib.org"]
        start_urls = ['http://matplotlib.org/examples/index.html']


        def parse(self, response):
           pass
parse方法是例子列表页面的解析函数,在该方法中提取每个例子页面的链接,用其构造Request对象并提交,提取链接的细节已在页面分析时讨论过,实现parse方法的代码如下:
     import scrapy
     from scrapy.linkextractors import LinkExtractor


     class ExamplesSpider(scrapy.Spider):
        name = "examples"
        allowed_domains = ["matplotlib.org"]
        start_urls = ['http://matplotlib.org/examples/index.html']
     def parse(self, response):


        le = LinkExtractor(restrict_css='div.toctree-wrapper.compound',
                                 deny='/index.html$')
        print(len(le.extract_links(response)))
        for link in le.extract_links(response):
            yield scrapy.Request(link.url, callback=self.parse_example)


     def parse_example(self, response):
        pass
上面代码中,我们将例子页面的解析函数设置为parse_example方法,下面来实现这个方法。例子页面中包含了例子源码文件的下载链接,在parse_example方法中获取源码文件的url,将其放入一个列表,赋给ExampleItem的file_urls字段。实现parse_example方法的代码如下:
     import scrapy
     from scrapy.linkextractors import LinkExtractor
     from ..items import ExampleItem
     class ExamplesSpider(scrapy.Spider):
        name = "examples"
        allowed_domains = ["matplotlib.org"]
        start_urls = ['http://matplotlib.org/examples/index.html']
        def parse(self, response):
           le = LinkExtractor(restrict_css='div.toctree-wrapper.compound',
                                 deny='/index.html$')
           print(len(le.extract_links(response)))
           for link in le.extract_links(response):
              yield scrapy.Request(link.url, callback=self.parse_example)
        def parse_example(self, response):
           href = response.css('a.reference.external::attr(href)').extract_first()
           url = response.urljoin(href)
           example = ExampleItem()
           example['file_urls'] = [url]
           return example
编码完成后,运行爬虫,并观察结果:
     $ scrapy crawl examples -o examples.json
     ...
     $ ls
     examples.json  examples_src  matplotlib_examples  scrapy.cfg
运行结束后,在文件examples.json中可以查看到文件下载结果信息:
          $ cat examples.json
          [
          {"file_urls": ["http://matplotlib.org/mpl_examples/axes_grid/demo_floating_axes.py"], "files": [{"url":
     "http://matplotlib.org/mpl_examples/axes_grid/demo_floating_axes.py", "checksum":
     "502d1cd62086fb1d4de033cef2e495c0", "path":
     "full/d9b551310a6668ccf43871e896f2fe6e0228567d.py"}]},
          {"file_urls": ["http://matplotlib.org/mpl_examples/axes_grid/demo_curvelinear_grid.py"], "files":
     [{"url": "http://matplotlib.org/mpl_examples/axes_grid/demo_curvelinear_grid.py", "checksum":
     "5cb91103f11079b40400afc0c1f4a508", "path":
     "full/366386c23c5b715c49801efc7f8d55d2c74252e2.py"}]},
          {"file_urls":
     ["http://matplotlib.org/mpl_examples/axes_grid/make_room_for_ylabel_using_axesgrid.py"], "files":
     [{"url": "http://matplotlib.org/mpl_examples/axes_grid/make_room_for_ylabel_using_axesgrid.py",
     "checksum": "dcf561f97ab0905521c1957cacd2da00", "path":
     "full/919cbbe6d725237e3b6051f544f6109e7189b4fe.py"}]},
          ...省略部分内容...
          {"file_urls": ["http://matplotlib.org/mpl_examples/api/custom_projection_example.py"], "files":
     [{"url": "http://matplotlib.org/mpl_examples/api/custom_projection_example.py", "checksum":
     "bde485f9d5ceb4b4cc969ef692df5eee", "path":
     "full/d56af342d7130ddd9dbf55c00664eae9a432bf70.py"}]},
          {"file_urls": ["http://matplotlib.org/examples/animation/dynamic_image2.py"], "files": [{"url":
     "http://matplotlib.org/examples/animation/dynamic_image2.py", "checksum":
     "98b6a6021ba841ef4a2cd36c243c516d", "path":
     "full/fe635002562e8685583c1b35a8e11e8cde0a6321.py"}]},
          {"file_urls": ["http://matplotlib.org/examples/animation/basic_example.py"], "files": [{"url":
     "http://matplotlib.org/examples/animation/basic_example.py", "checksum":
     "1d4afc0910f6abc519e6ecd32c66896a", "path":
     "full/083c113c1dac96bbc74adfc5b08cad68ec9c16db.py"}]}
再来查看文件下载目录exmaples_src:
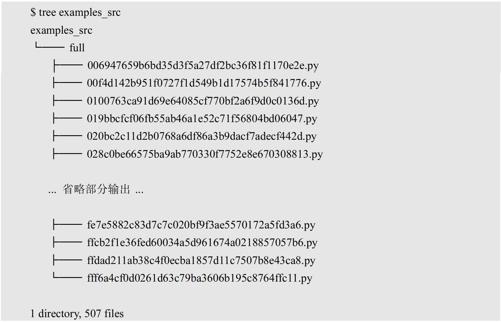
如上所示,507个源码文件被下载到了examples_src/full目录下,并且每个文件的名字都是一串长度相等的奇怪数字,这些数字是下载文件url的sha1散列值。例如,某文件url为:
http://matplotlib.org/mpl_examples/axes_grid/demo_floating_axes.py
该url的sha1散列值为:
d9b551310a6668ccf43871e896f2fe6e0228567d
那么该文件的存储路径为:
     # [FILES_STORE]/full/[SHA1_HASH_VALUE].py
     examples_src/full/d9b551310a6668ccf43871e896f2fe6e0228567d.py
这种命名方式可以防止重名的文件相互覆盖,但这样的文件名太不直观了,无法从文件名了解文件内容,我们期望把这些例子文件按照类别下载到不同目录下,为完成这个任务,可以写一个单独的脚本,依据examples.json文件中的信息将文件重命名,也可以修改FilesPipeline为文件命名的规则,这里采用后一种方式。
阅读FilesPipeline的源码发现,原来是其中的file_path方法决定了文件的命名,相关代码如下:
     class FilesPipeline(MediaPipeline):
        ...
        def file_path(self, request, response=None, info=None):
        ...
        # check if called from file_key with url as first argument
        if not isinstance(request, Request):
            _warn()
            url = request
        else:
            url = request.url
        # detect if file_key() method has been overridden
        if not hasattr(self.file_key, '_base'):
            _warn()
            return self.file_key(url)
        ## end of deprecation warning block
        media_guid = hashlib.sha1(to_bytes(url)).hexdigest()
        media_ext = os.path.splitext(url)[1]
        return 'full/%s%s' % (media_guid, media_ext)
     ...
现在,我们实现一个FilesPipeline的子类,覆写file_path方法来实现所期望的文件命名规则,这些源码文件url的最后两部分是类别和文件名,例如:
http://matplotlib.org/mpl_examples/(axes_grid/demo_floating_axes.py)
可用以上括号中的部分作为文件路径,在pipelines.py实现MyFilesPipeline,代码如下:
     from scrapy.pipelines.files import FilesPipeline
     from urllib.parse import urlparse
     from os.path import basename, dirname, join


     class MyFilesPipeline(FilesPipeline):


        def file_path(self, request, response=None, info=None):
           path = urlparse(request.url).path
           return join(basename(dirname(path)), basename(path))
修改配置文件,使用MyFilesPipeline替代FilesPipeline:
     ITEM_PIPELINES = {
       #'scrapy.pipelines.files.FilesPipeline': 1,
       'matplotlib_examples.pipelines.MyFilesPipeline': 1,
     }
删除之前下载的所有文件,重新运行爬虫后,再来查看examples_src目录:

从上述结果看出,507个文件按类别被下载到26个目录下,这正是我们所期望的。
到此,文件下载的项目完成了。
9.3 项目实战:下载360图片
我们再来完成一个使用ImagesPipeline下载图片的实战项目。360图片是一个知名的图片搜索网站,在浏览器中打开http://image.so.com,页面如图9-5所示。
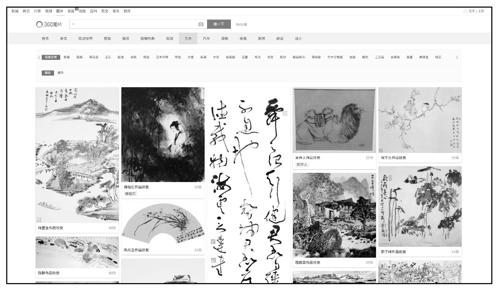
图9-5
其中,艺术分类下有大量字画图片,我们可以编写爬虫爬取这些图片。
9.3.1 项目需求
下载360图片网站中艺术分类下的所有图片到本地。
9.3.2 页面分析
在图9-5所示的页面中向下滚动鼠标滚轮,便会有更多图片加载出来,图片加载是由JavaScript脚本完成的,在图9-6中可以看到jQuery发送的请求,其响应结果是一个json串。

图9-6
复制图中jQuery发送请求的url,使用scrapy shell进行访问,查看响应结果的内容(json):
     $ scrapy shell 'http://image.so.com/zj?ch=art&sn=30&listtype=new&temp=1'
     ...
     >>> import json
     >>> res = json.loads(response.body.decode('utf8'))
     >>> res
     {'count': 30,
     'end': False,
     'lastid': 60,
     'list': [{'cover_height': 942,
      'cover_imgurl': 'http://www.sinaimg.cn/dy/slidenews/26_img/2011_27/17290_50560_803601.jpg',
      'cover_width': 950,
      'dsptime': '',
      'group_title': '李正天作品欣赏',
      'grpseq': 1,
      'id': 'e4e6dbc8c5deaf2799d396569904227f',
      'imageid': '5332cbd95b1098f0e9325a16ce022a74',
      'index': 31,
      'label': '',
      'qhimg_height': 236,
      'qhimg_thumb_url': 'http://p0.so.qhimgs1.com/sdr/238__/t01ab50e7f19a03afa0.jpg',
      'qhimg_url': 'http://p0.so.qhimgs1.com/t01ab50e7f19a03afa0.jpg',
      'qhimg_width': 238,
      'tag': '新浪艺术名家人物库',
      'total_count': 70},
      {'cover_height': 1798,
      'cover_imgurl': 'http://www.sinaimg.cn/dy/slidenews/26_img/2011_15/18496_33310_603704.jpg',
      'cover_width': 950,
      'dsptime': '',
      'group_title': '崔自默作品欣赏',
      'grpseq': 1,
      'id': 'f08148a113c6c2e6104a77798d285d88',
      'imageid': 'c6662a238bb6faf9b22a335db6707fff',
      'index': 32,
      'label': '',
      'qhimg_height': 450,
      'qhimg_thumb_url': 'http://p0.so.qhmsg.com/sdr/238__/t01b187fc2ce65e29b5.jpg',
      'qhimg_url': 'http://p0.so.qhmsg.com/t01b187fc2ce65e29b5.jpg',
      'qhimg_width': 238,
      'tag': '新浪艺术名家人物库',
      'total_count': 53},
      {'cover_height': 950,
      'cover_imgurl': 'http://www.sinaimg.cn/dy/slidenews/26_img/2011_32/18496_59078_243228.jpg',
      'cover_width': 950,
      'dsptime': '',
     'group_title': '徐宁作品欣赏',
     'grpseq': 1,
     'id': 'ed8686ac7f10dfb52d68baca348a08be',
     'imageid': '51c2b804fb6d402486737c29c5301a84',
     'index': 33,
     'label': '',
     'qhimg_height': 238,
     'qhimg_thumb_url': 'http://p2.so.qhmsg.com/sdr/238__/t017f259639fd6c8287.jpg',
     'qhimg_url': 'http://p2.so.qhmsg.com/t017f259639fd6c8287.jpg',
     'qhimg_width': 238,
     'tag': '新浪艺术名家人物库',
     'total_count': 161},


     ...省略中间部分...


     {'cover_height': 377,
     'cover_imgurl': 'http://www.sinaimg.cn/dy/slidenews/26_img/2011_03/16418_23122_876413.jpg',
     'cover_width': 950,
     'dsptime': '',
     'group_title': '王国斌作品欣赏',
     'grpseq': 1,
     'id': '8e173e45250d90d2dc7316777e2be59b',
     'imageid': 'c7d7e74dc18685f5c100d235522d5e4b',
     'index': 59,
     'label': '',
     'qhimg_height': 94,
     'qhimg_thumb_url': 'http://p2.so.qhimgs1.com/sdr/238__/t014d248b01108afebe.jpg',
     'qhimg_url': 'http://p2.so.qhimgs1.com/t014d248b01108afebe.jpg',
     'qhimg_width': 238,
     'tag': '新浪艺术名家人物库',
     'total_count': 13},
     {'cover_height': 1215,
     'cover_imgurl': 'http://www.sinaimg.cn/dy/slidenews/26_img/2011_09/17732_26034_613620.jpg',
     'cover_width': 900,
     'dsptime': '',
     'group_title': '王习三作品欣赏',
     'grpseq': 1,
     'id': '989031bb929f667f8eb920cfa21e32fa',
     'imageid': 'f57b9882a93265edcd85e59d3fbb8a4c',
     'index': 60,
     'label': '王习三',
     'qhimg_height': 321,
     'qhimg_thumb_url': 'http://p4.so.qhmsg.com/sdr/238__/t015381735d7c0aa2a9.jpg',
     'qhimg_url': 'http://p4.so.qhmsg.com/t015381735d7c0aa2a9.jpg',
     'qhimg_width': 238,
     'tag': '新浪艺术名家人物库',
     'total_count': 31}]}
如上所示,响应结果(json)中的list字段是一个图片信息列表,count字段是列表中图片信息的数量,每一项图片信息的qhimg_url字段是图片下载地址。
连续滚动鼠标滚轮加载图片,捕获更多jQuery发送的请求:
第1次加载:http://image.so.com/zj?ch=art&sn=30&listtype=new&temp=1
第2次加载:http://image.so.com/zj?ch=art&sn=60&listtype=new&temp=1
第3次加载:http://image.so.com/zj?ch=art&sn=90&listtype=new&temp=1
……
经过观察,可以总结出这些url的规律:
● ch参数 分类标签。
● sn参数 从第几张图片开始加载,即结果列表中第一张图片在服务器端的序号。
我们可以通过这个API每次获取固定数量的图片信息,从中提取每一张图片的url(下载地址),直到响应结果中的count字段为0(意味着没有更多图片了)。
到此,页面分析工作完成了。
9.3.3 编码实现
接下来,我们按以下3步完成该项目:
(1)创建Scrapy项目,并使用scrapy genspider命令创建Spider。
(2)在配置文件中启用ImagesPipeline,并指定图片下载目录。
(3)实现ImagesSpider。
步骤 01 首先创建Scrapy项目,取名为so_image,再使用scrapy genspider命令创建Spider。
     $ scrapy startproject so_image
     $ cd so_image
     $ scrapy genspider images image.so.com
步骤 02 在配置文件settings.py中启用ImagesPipeline,并指定图片下载目录,代码如下:
     ITEM_PIPELINES = {
       'scrapy.pipelines.images.ImagesPipeline': 1,
     }
     IMAGES_STORE = 'download_images'
步骤 03 实现IamgesSpider,代码如下:
         # -*- coding: utf-8 -*-
         import scrapy
         from scrapy import Request
         import json


         class ImagesSpider(scrapy.Spider):
             BASE_URL = 'http://image.so.com/zj?ch=art&sn=%s&listtype=new&temp=1'
             start_index = 0


             # 限制最大下载数量,防止磁盘用量过大
             MAX_DOWNLOAD_NUM = 1000


             name = "images"
             start_urls = [BASE_URL % 0]


             def parse(self, response):
                # 使用json 模块解析响应结果
                infos = json.loads(response.body.decode('utf-8'))
                # 提取所有图片下载url 到一个列表, 赋给item的'image_urls'字段
                yield {'image_urls': [info['qhimg_url'] for info in infos['list']]}


                # 如count 字段大于0,并且下载数量不足MAX_DOWNLOAD_NUM,继续获取下一页
     图片信息
                self.start_index += infos['count']
                if infos['count'] > 0 and self.start_index < self.MAX_DOWNLOAD_NUM:
                   yield Request(self.BASE_URL % self.start_index)
编码完成后,运行爬虫:
$ scrapy crawl images
运行结束后,查看图片下载目录download_images,如图9-7所示,我们成功爬取到了607张艺术图片。
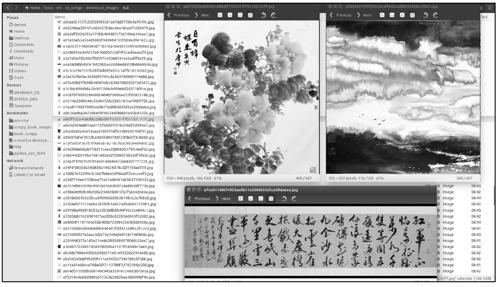
图9-7
到此,图片下载的项目完成了。
9.4 本章小结
本章我们学习了在Scrapy中下载文件和图片的方法,先简单介绍了Scrapy提供的FilesPipeline和ImagesPipeline,然后通过两个实战项目演示了FilesPipeline和ImagesPipeline的使用。


